
Background
With the advent of the Integration Services Catalog, parameters for SSIS packages no longer need to be controlled using a configuration file (usually with the extension of ‘.dtsconfig’). Now the parameters can be stored within the Integration Services Catalog (and therefore, within the SSISDB database) and altered far more easily within an agent job.
This example uses SQL Server 2012.
Example
As a demonstration, create a simple SSIS package that takes a flat file source and imports it into a database table.
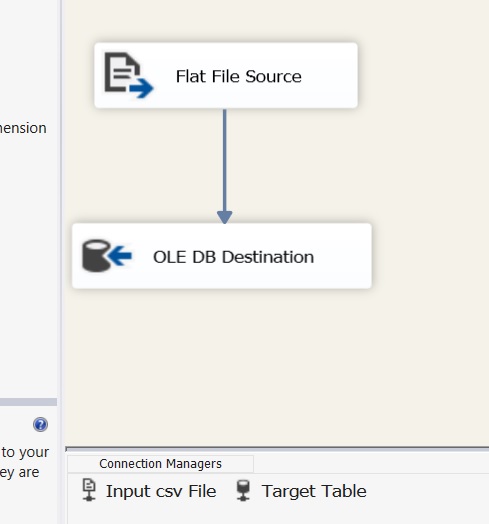
Basic SSIS Package
I’ve created two connections – ‘Input csv file’:
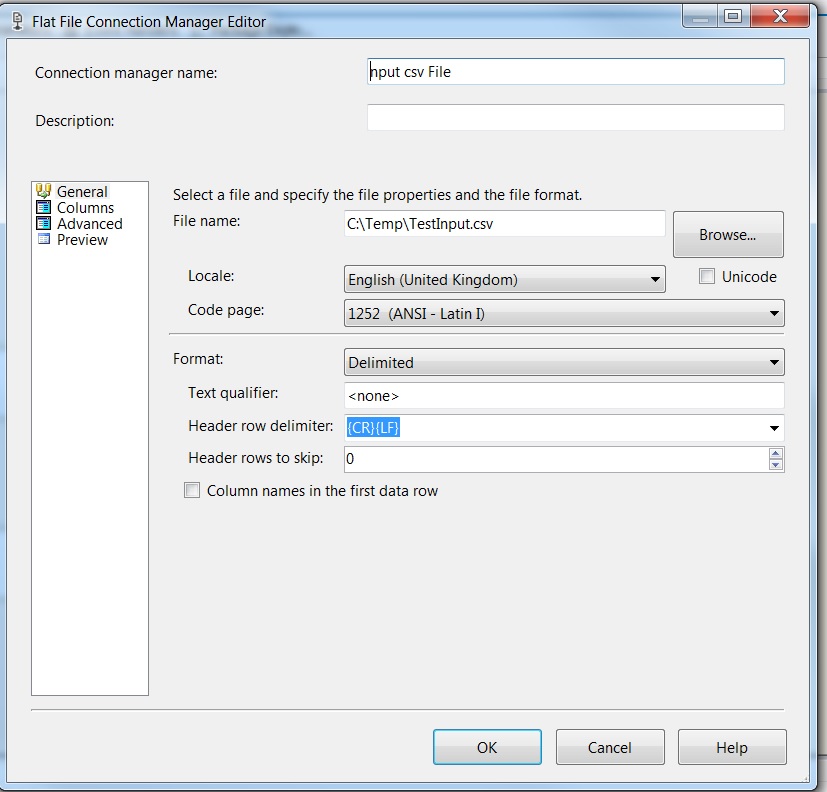
Flat File Connection
And ‘Target Table’:
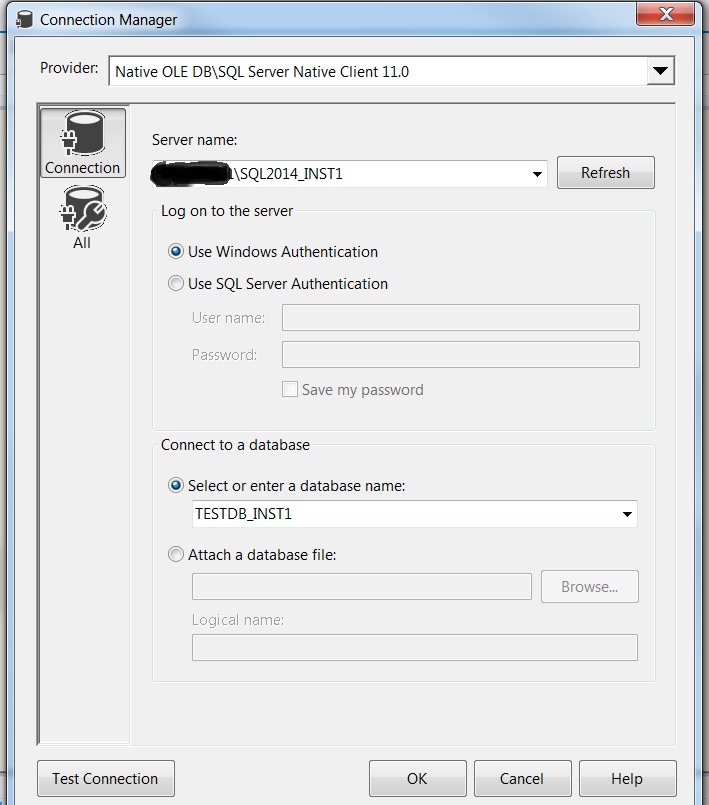
DB Connection
Nothing exciting in those. ‘Input csv file’ provides the details of the csv file I’m using for this simple test and ‘Target Table’ provides the details for table that will receive the csv file’s contents.
Of course, these connections are effectively hard-coded. Unless a method is implemented to change these, then it will always have to be the same input file, in the same location, copying data to the same table on the same database within the same server.
Older versions of SSIS used to make use of an XML configuration file, which would be associated with the SSIS package within the agent job that controlled it. This worked quite well but did mean that there was a separate document that needed to be associated with the SSIS package. If it was inaccessible, lost or corrupted then this would cause issues with the package execution.
Now the settings are stored within the SSIS package.
Creating Parameters
Within Data Tools there is now a tab entitled ‘Parameters’. Go to this, click on the ‘Add parameter’ icon for each new parameter required and create your parameters.

Parameter tab within SSIS Project
In this example I have created three – the full pathname of the input csv file (called ‘Source_File’), the target database (‘Target_DB’) and the name of the server that the database is within (‘Target_Server’). In this case all of the parameters are of type ‘string’. The value is the value I want to use at this time. The ‘sensitive’ column controls whether the parameter will be encrypted within the catalog and ‘Required’ dictates whether the parameter must be supplied or not. The ‘Description’ column is used to add a description that should prove helpful to anybody that needs to understand the purpose of this parameter.
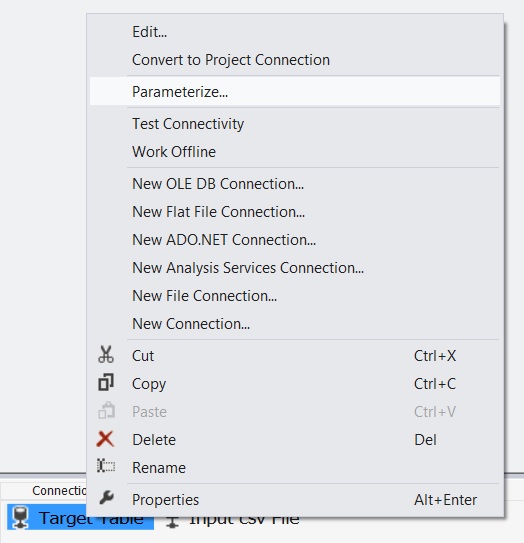
Associate parameters to controls
Now that the parameters have been created they need to associated with the required controls. Within the Connection Manger, right-click on the required connection and select ‘Parameterize…’.
Parameterize Wizard
This produces a wizard, where you select the property that you wish to set via a parameter. Then you have the option to ‘Use existing parameter’ – select this and the drop-down list will show all of the parameters created earlier in the ‘Creating Parameters’ section of this article. Select the required parameter and press ‘OK’.
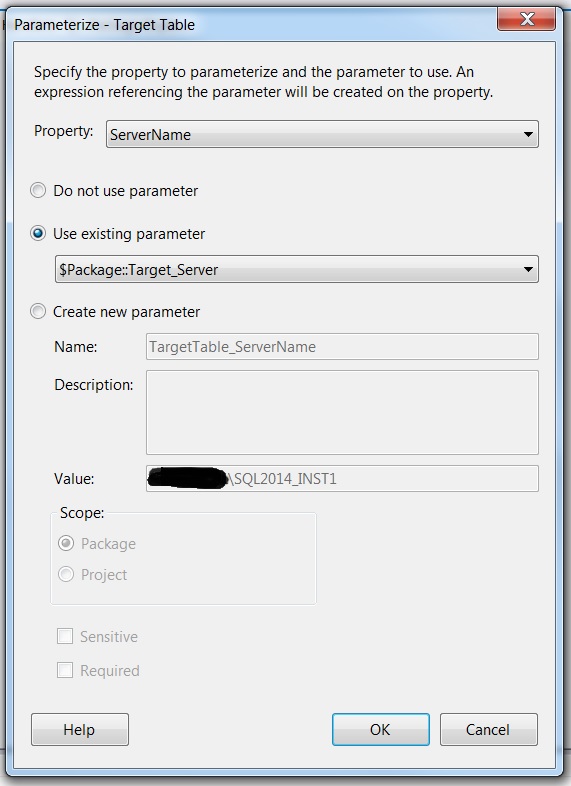
Setting the ServerName property
In this example above, I have associated the parameter ‘Target_Server’ with the property ‘ServerName’ of the ‘Target Table’ connection.
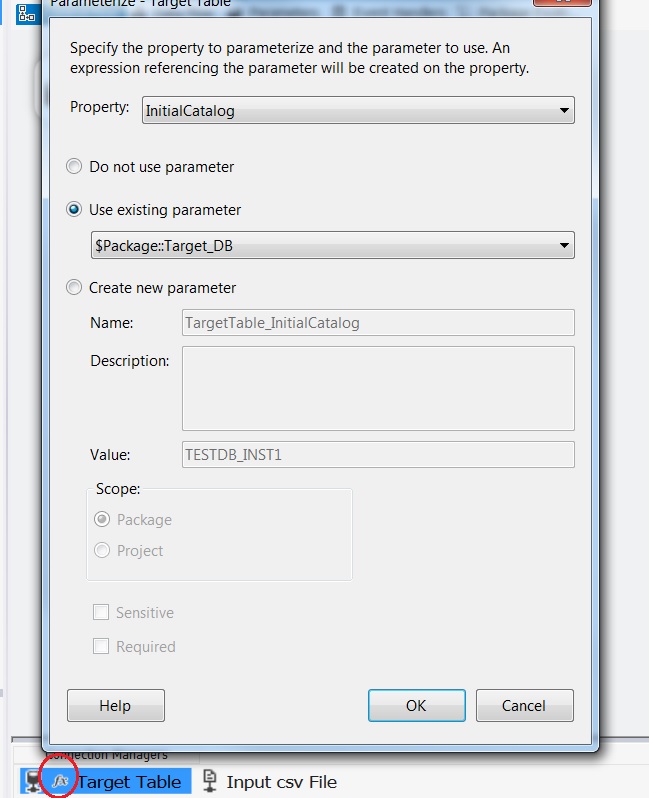
Setting the InitialCatalog Property
And I have also associated the parameter ‘Target_DB’ with the ‘InitialCatalog’ property of the ‘Target Table’ connection.
Notice that a symbol appears alongside the connection, signifying that there are parameters in use within this.
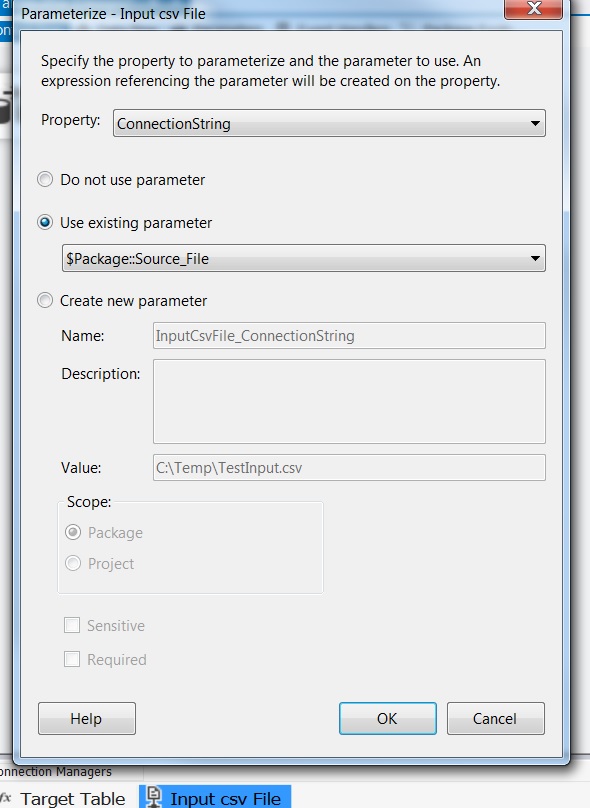
Setting the ConnectionString Property
Setting the parameter ‘Source_File’ as the parameter for the property ‘ConnectionString’ of the connection ‘input csv file’ means that I now have parameters in use for the source file, target server and target database.
Testing within the editor
Now go back to the ‘Parameters’ tab and change one of the values.

Changing a Parameter
In this case I’ve changed the ‘Target_Server’ value to a new value. Having altered the parameter you must now save the project for this change to take effect.
Having saved the project you will find that the value within the connection that uses the ‘Target_Server’ has now changed.

Showing the Changed Value
Changing Parameters for a Deployed Package
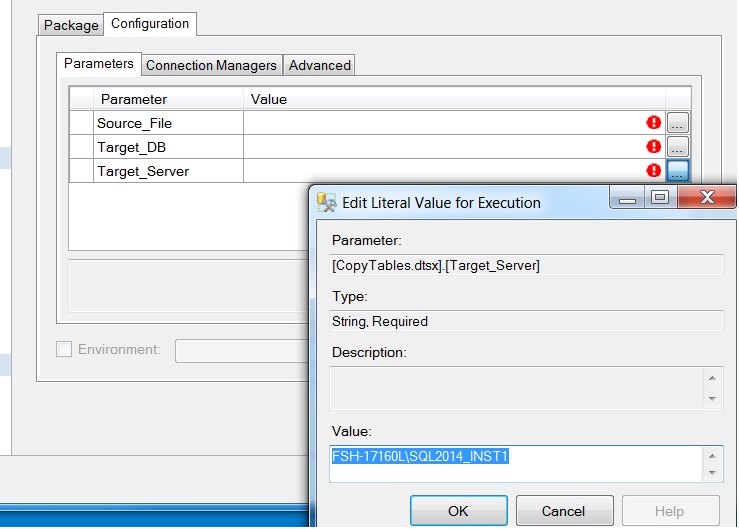
Once a project is deployed to the integration Services Catalog the parameters can be accessed by right-clicking on the project (or .dtsx name) name and selecting ‘Configure’. The tab ‘Parameters’ gives you the ability to set the parameters that were created earlier, by clicking on the ellipse at the end of each parameter line.
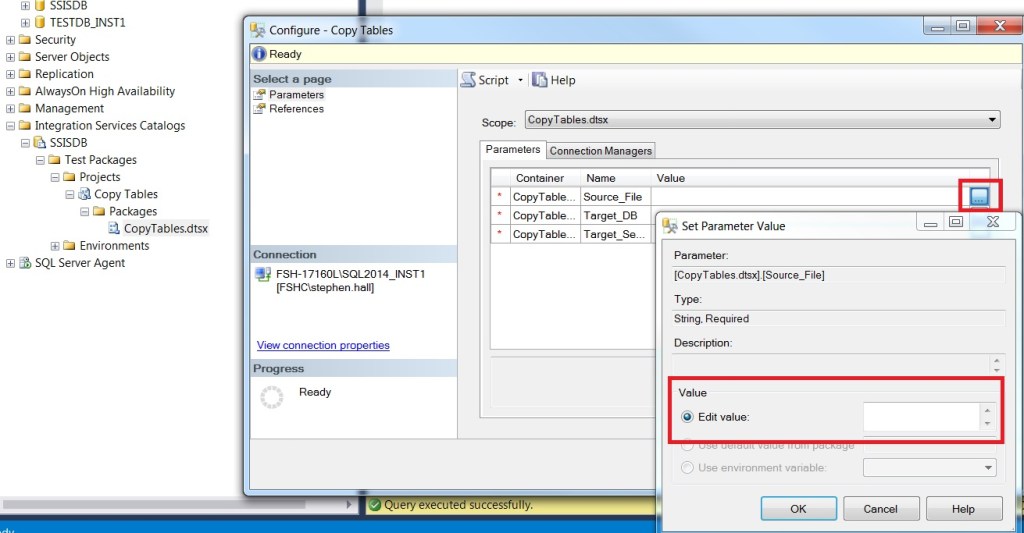
Setting Parameters via ISC
The parameters can also be set within the agent job that will be created to execute this package, via the ‘Configuration’ and then ‘Parameters’ tab of the associated step.

Parameters via Agent Job
Editing the Value

Final Parameter Settings
Now I can change the parameter values within the agent job, instead of relying upon a separate dtsx file. This also means that when I move a project from one server to another it is a far simpler task to alter the parameters, as they are contained within the project.
