
Overview
In an earlier article, I described how to set up a cluster and AG in Hyper-V. For an issue that I am now researching a solution to, I require an additional drive on my SQL Server environments. Adding a new drive to a Hyper-V VM is fairly straightforward but I had to dig around a little.
Two Steps
There are two steps to what I require – I add the drive to the VM itself and then I make that drive available within the Windows environment.
Adding the Drive to the VM
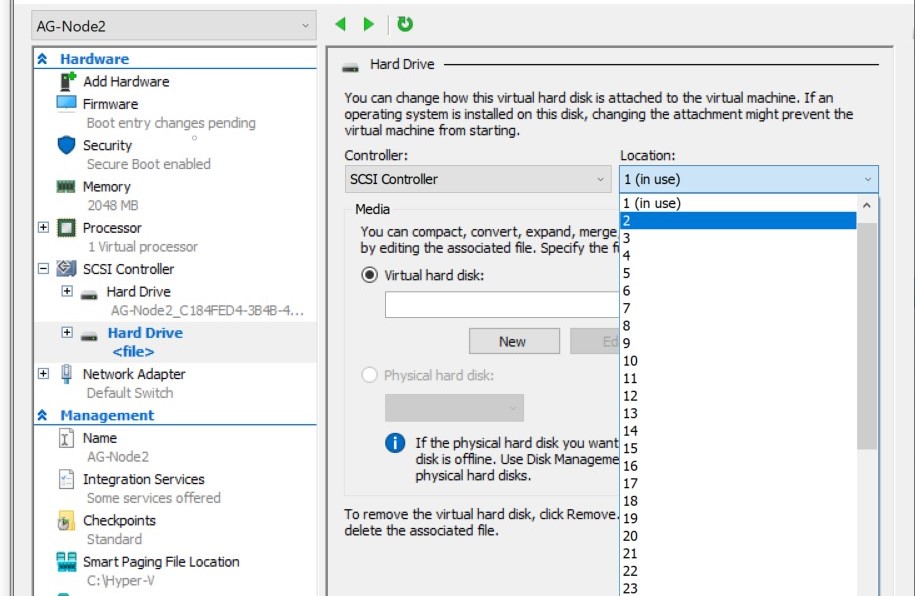
Within the Hyper-V Manager, select the required VM and then go to ‘Settings’ and then click on ‘SCSI Controller’. Select ‘Hard Drive’ and click on ‘Add’.
Figure 1: Selecting the media to add

The screen that follows this will request a new ‘location’. This is a drop-down list that will show the allocated locations (signified by ‘(in use)’ after those) as well as those available for use. Select the next available number.
Figure 2: Select an Unused Location
Now click on the ‘New’ button, shown under the ‘Virtual Hard Disk’ radio button.
This will show first screen of the New Virtual Disk Wizard.
Figure 3: The Wizard Starts

Select the type of disk – Fixed, Dynamic or Difference. I selected Fixed.
Figure 4: Disk Type

Then specify a name for the file and a location. There are defaults for these – I changed mine just to be a little tidier for my multiple environments.
Figure 5: Naming and Locating the File

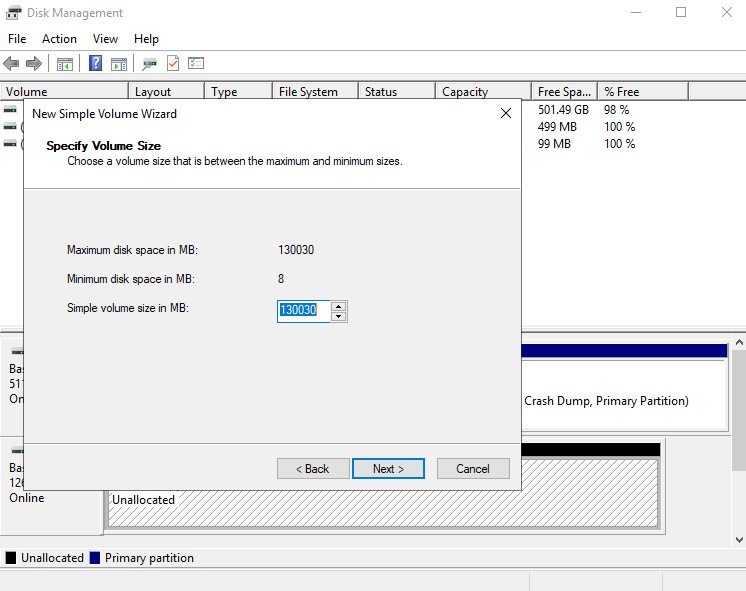
Then you specify the size you require for the new disk. This screen also shows the amount of space available on your machine.
Figure 6: Specify the Size

The Wizard will now show a summary – click ‘Finish’ to create the disk.
Figure 7: The Wizard Summary

The new drive has now been created and is attached to the VM.
Figure 8: Second Drive on the VM

However, creating the drive against the VM does mean that it is immediately available to Windows. It now requires allocating and formatting.
Allocating the Drive Within Windows
Start the VM that we have just created the new drive against.
Within Windows Explorer, the new drive is not visible.
Figure 9: No Sign of the Drive in Explorer

The next step is to use Windows Disk management tool, to allocated the new drive.
Click on the Windows Start icon and type ‘partition’, then click on ‘Create and format hard disk partitions’.
Figure 10: Locating the Disk Management tool

This shows the attached disks. The new ‘Disk1’ is highlighted in black, signifying ‘Unallocated’.
Figure 11: Available Disks

Right-click where the ‘Disk1’ name is and select ‘Online’.
Figure 12: Bring This Disk Online

This will change the wording of the status from ‘Offline’ to ‘Not Initialized’.
Figure 13: No Longer Offline

Right-click on the drive and select ‘Initialize Disk’.
Figure 14: Initialize

Then confirm the disk required and the partition style (it shouldn’t be MBR for a second drive).
Figure 15: Confirm the disk

Having completed that, now right-click again and select ‘New Simple Volume…’.
Figure 16: Start the Wizard

This will launch the New Simple Volume Wizard.
Figure 17: The Wizard Starts

For my requirements, allocating all of the available space is suitable.
Figure 18: Specify Disk Volume
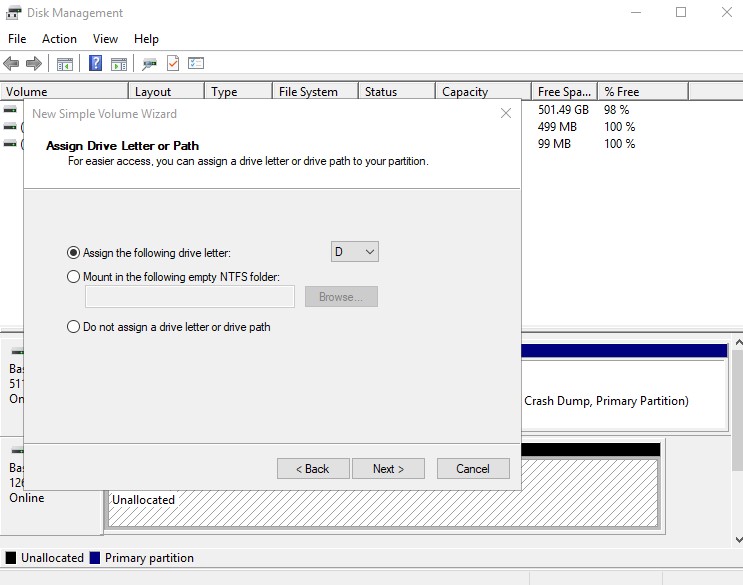
Then allocate a drive letter to this new disk.
Figure 19: Allocate an Available Drive Letter
Then specify a format. The label isn’t always necessary but I do specify it. A quick format should be sufficient.
Figure 20: Formatting the New Disk

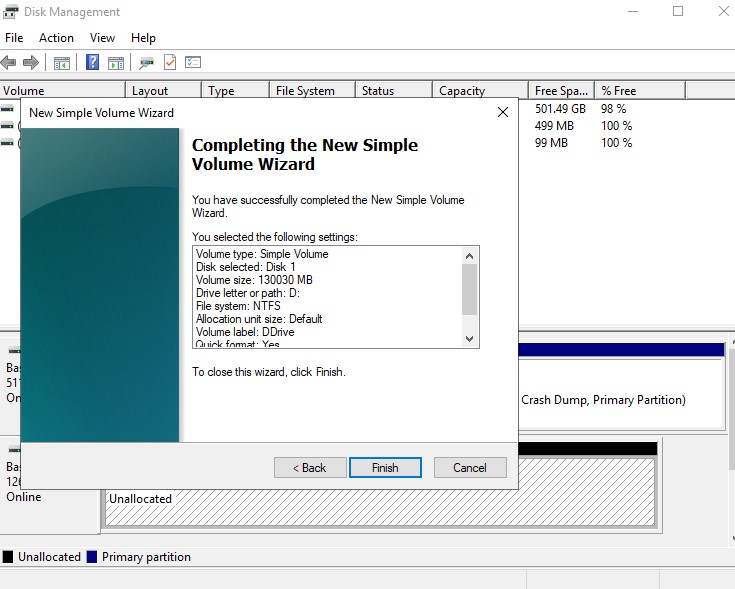
The Wizard’s summary screen will now show the requested actions. Click on ‘Finish’ to commit the changes.
Figure 21: Wizard Summary
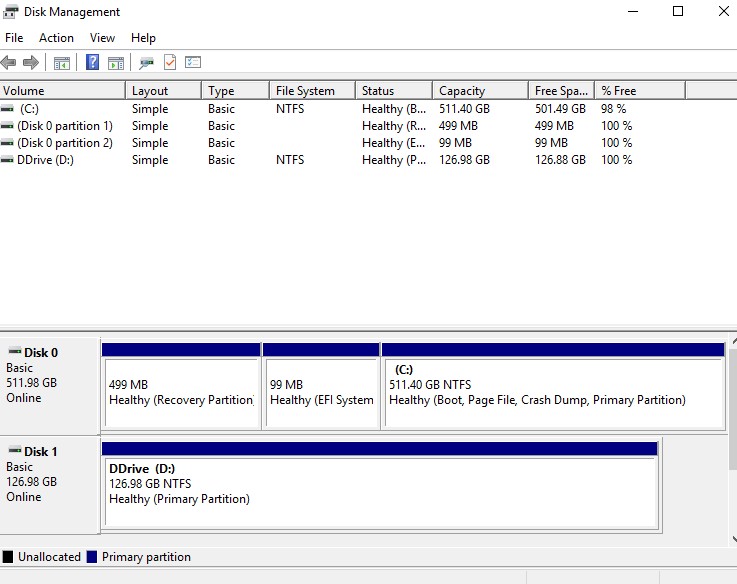
The Disk Management console will now show the new disk as online and healthy.
Figure 22: The New Disk Allocated
And it is also visible on Windows Explorer.

